Tutorials > Build your first app
Part 4: Adding and removing liquidity
Last Updated: 12th September 2023
As mentioned before, users stake XTZ and tzBTC to the LB contract in a process called "adding liquidity." Those tokens become the liquidity pool that other users can use to swap tokens. In this section, you will enhance the application to allow users to:
- Stake tokens and receive SIRS
- Return the SIRS and receive their XTZ and tzBTC back with interest
The most difficult part of this process is getting the tokens amounts correct. Sending the transactions to Tezos is simple compared to the swap transactions.
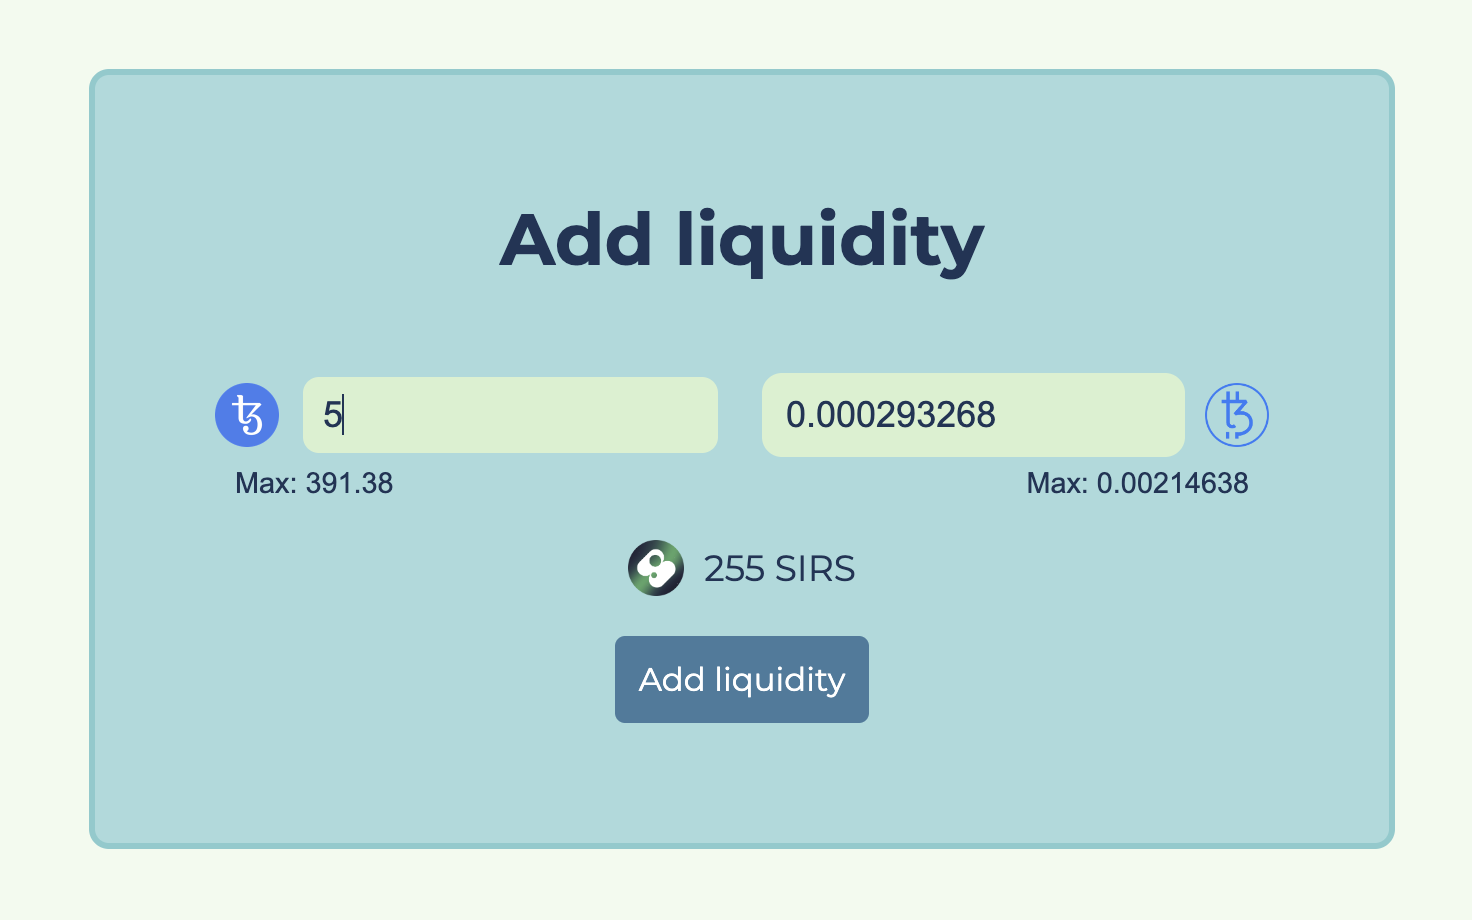
The interface for staking tokens looks similar to the interface for swapping, but in this case, both token amounts are editable. The user enters a token amount in one of the fields and the app calculates the amount of the other token in the other field. Then, it displays the amount of SIRS tokens that the user receives, as in this picture:

Calculating token amounts
To set up the code that handles adding and removing liquidity, copy these files from the tutorial repository at https://github.com/trilitech/tutorial-applications/tree/main/liquidity-baking-dapp:
src/lib/AddLiquidityView.sveltesrc/lib/RemoveLiquidityView.sveltesrc/lib/SirsStats.svelte
When the user enters a number into one of the fields, the app runs these steps:
The input field runs the
saveInputfunction in theAddLiquidityView.sveltefile and passes the name of the selected token and the amount. This function calculates the amounts for the UI based on the field that the user filled in. For example, if the user specifies an amount of XTZ, this code calculates the amount of tzBTC and stores it in theinputTzbtcvariable:if (token === "XTZ" && val && val > 0) { inputXtz = val.toString(); let tzbtcAmount = addLiquidityTokenIn({ xtzIn: val * 10 ** 6, xtzPool: $store.dexInfo.xtzPool, tokenPool: $store.dexInfo.tokenPool }); if (tzbtcAmount) { inputTzbtc = tzbtcAmount.dividedBy(10 ** 8).toPrecision(6); } else { inputTzbtc = ""; } // ... }The function calculates the amount of liquidity created by the transaction via the
addLiquidityLiquidityCreatedfunction and stores it in thesirsOutputvariable:const liquidityCreated = addLiquidityLiquidityCreated({ xtzIn: val * 10 ** 6, xtzPool: $store.dexInfo.xtzPool, totalLiquidity: $store.dexInfo.lqtTotal }); if (liquidityCreated) { sirsOutput = Math.floor(liquidityCreated.toNumber()); } else { sirsOutput = 0; }You can see the code of the
addLiquidityLiquidityCreatedfunction in thesrc/lbUtils.tsfile.This function takes 3 parameters:
- The amount of XTZ to add
- The current state of the XTZ pool
- The total amount of liquidity available in the contract, represented by the SIRS tokens
The function returns the amount of SIRS that is created after the transaction. The
saveInputfunction stores this amount in thesirsOutputvariable and shows it on the interface.
Sending the transaction
When the user confirms the transaction to add liquidity, the app runs the addLiquidity function:
The function verifies that the token amounts are set and updates the UI to show that the transaction is in progress.
The function creates objects of the
ContractAbstractiontype to represent the LB contract and the contract that manages tzBTC:const lbContract = await $store.Tezos.wallet.at(dexAddress); const tzBtcContract = await $store.Tezos.wallet.at(tzbtcAddress);
As with the transaction to swap tzBTC to XTZ, the transaction to add liquidity requires multiple steps. You could use a Taquito batch operation as in the swap function, but to illustrate a different way of bundling the transactions, the
addLiquidityfunction passes transactions to thebatchmethod as an array:const batch = $store.Tezos.wallet.batch([ { kind: OpKind.TRANSACTION, ...tzBtcContract.methods.approve(dexAddress, 0).toTransferParams() }, { kind: OpKind.TRANSACTION, ...tzBtcContract.methods .approve(dexAddress, tzbtcForLiquidity) .toTransferParams() }, { kind: OpKind.TRANSACTION, ...lbContract.methodsObject .addLiquidity({ owner: $store.userAddress, minLqtMinted: sirsOutput, maxTokensDeposited: tzbtcForLiquidity, deadline: calcDeadline() }) .toTransferParams(), amount: +inputXtz }, { kind: OpKind.TRANSACTION, ...tzBtcContract.methods.approve(dexAddress, 0).toTransferParams() } ]);This series of transactions is similar to the transactions that swap tokens:
- It calls the LB contract's
approveentrypoint to set the number of tokens that the contract can take from the wallet to 0. - It calls the LB contract's
approveentrypoint to set the number of tokens that the contract can take from the wallet to the number of tokens that the user intends to send. - It sends the transaction with the tokens.
- It sets the the number of tokens that the contract can take from the wallet back to 0.
This is the call to the contract's
addLiquidityentrypoint:{ kind: OpKind.TRANSACTION, ...lbContract .methodsObject .addLiquidity({ owner: $store.userAddress, minLqtMinted: sirsOutput, maxTokensDeposited: tzbtcForLiquidity, deadline: calcDeadline() }) .toTransferParams(), amount: +inputXtz }It passes these parameters, put in an object by the
methodsObjectmethod:- The address of the account that receives the SIRS tokens
- The minimum amount of SIRS tokens to be received
- The amount of tzBTC deposited
- The deadline
Finally, it adds the amount of XTZ as the last property of the operation. This field must be after the
toTransferParamsfunction or it is overwritten with the default amount, which is zero.- It calls the LB contract's
Then the function sends the transaction to Tezos and waits for it to complete:
const batchOp = await batch.send();
await batchOp.confirmation();
The function clears the UI:
addLiquidityStatus = TxStatus.Success;
inputXtz = "";
inputTzbtc = "";
sirsOutput = 0;
The function updates the user's balances with the
fetchBalancesfunction.
Now the app uses can add liquidity to the Liquidity Baking contract and invest their XTZ and tzBTC.
Removing liquidity
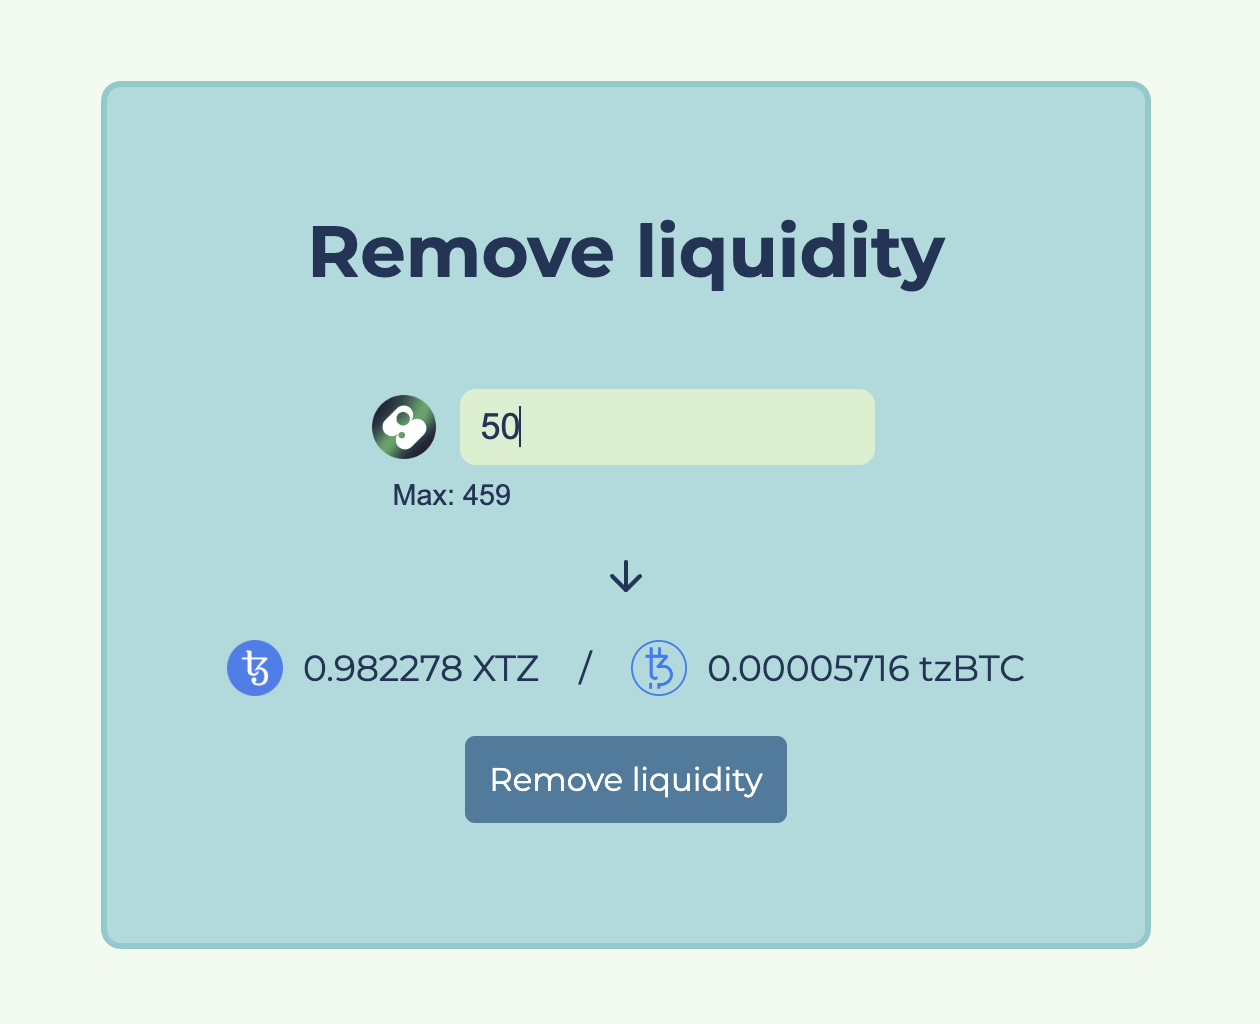
The transaction to remove liquidity requires only the amount of SIRS that the user wants to exchange for tzBTC and XTZ. Therefore, the UI shows only one input field:

The app uses the removeLiquidityXtzTzbtcOut function in the src/lbUtils.ts file to calculate the amount of XTZ and tzBTC that the user receives:
const outputRes = removeLiquidityXtzTzbtcOut({
  liquidityBurned: val,
  totalLiquidity: $store.dexInfo.lqtTotal.toNumber(),
  xtzPool: $store.dexInfo.xtzPool.toNumber(),
  tokenPool: $store.dexInfo.tokenPool.toNumber()
  });
if (outputRes) {
  const { xtzOut, tzbtcOut } = outputRes;
  xtzOutput = xtzOut
    .decimalPlaces(0, 1)
    .dividedBy(10 ** 6)
    .decimalPlaces(6)
    .toNumber();
  tzbtcOutput = tzbtcOut
    .decimalPlaces(0, 1)
    .dividedBy(10 ** 8)
    .decimalPlaces(8)
    .toNumber();
  }
This function takes an object as a parameter with 4 properties:
liquidityBurned: The amount of SIRS to return and burntotalLiquidity: The total amount of SIRS tokens in the contractxtzPool: The total amount of XTZ tokens in the contracttokenPool: The total amount of tzBTC tokens in the contract
The removeLiquidity function in the src/lib/RemoveLiquidityView.svelte file creates the transaction by running these steps:
It verifies the number of SIRS to return and updates the UI to show that a transaction is pending.
It creates an object of the
ContractAbstractionthat represents the LB contract:const lbContract = await $store.Tezos.wallet.at(dexAddress);
It creates the transaction, sends it, and waits for it to complete:
const op = await lbContract.methodsObject
  .removeLiquidity({
    to: $store.userAddress,
    lqtBurned: inputSirs,
    minXtzWithdrawn: Math.floor(xtzOutput * 10 ** XTZ.decimals),
    minTokensWithdrawn: Math.floor(tzbtcOutput * 10 ** tzBTC.decimals),
    deadline: calcDeadline()
  })
  .send();
await op.confirmation();
The
removeLiquidityentrypoint accepts these parameters:to: The account that receives the XTZ and tzBTClqtBurned: The amount of SIRS to return and burnminXtzWithdrawn: The minimum amount of XTZ to receiveminTokensWithdrawn: The minimum amount of tzBTC to receivedeadline: The deadline
The function updates the user's balances with the
fetchBalancesfunction.
Now the users can return their SIRS tokens and receive their XTZ and tzBTC tokens.
Summary
You've made it until the end of this tutorial! 🙂
To start the application, run npm run dev from the command line and open it in a browser.
You learned: many concepts that are fundamental to developing applications on Tezos and to understanding how Tezos works in general, including:
How to use Taquito to develop on Tezos, interact with smart contracts, and use wallet, whether you want to prototype ideas quickly or want to create full-stack decentralized applications.
How to use the Beacon SDK to interact with wallets.
How to use the TzKT API to get data from the blockchain.
Although this tutorial uses Svelte for its framework, the skills you learned are transferrable to other JS/TS frameworks, because many of them use the same concepts, such as similar component lifecycles.
Now you know many of the things that you need to build amazing dApps on Tezos and we can't wait to see what you build next!